If you’re anything like me, you appreciate the ability to get a bird’s eye view of your whole homeschool plan from time to time. It can be very encouraging to know where we’re ultimately headed when we’re daily down in the weeds of Latin verb conjugations and memorizing arithmetic facts. I put together this simple way of organizing long-term homeschool planning because I wanted to make sure I was on track for completing the classes my students would need when headed into high school and dual-enrollment courses.
Additionally, I wanted something to keep me on a basic track for when to complete certain subjects and when to add in or take out other subjects to keep our schedule from being too overwhelming. Because we celebrate the biblical festivals, our school schedule changes each year as the dates are always different for these special holidays, and this spreadsheet enables me to see at-a-glance when we have breaks coming up. As you’ll see, it is easily adapted for whatever stage you might be in on your homeschool journey. This type of spreadsheet can be used to plan your overall school year, but you will still need to utilize something like Homeschool Tracker or a paper planner for your daily and weekly scheduled lessons. Although the process might seem a bit daunting at first, I promise it will save loads of time as you use it. I have been using the same spreadsheet for many years, only making small tweaks here and there as needed.
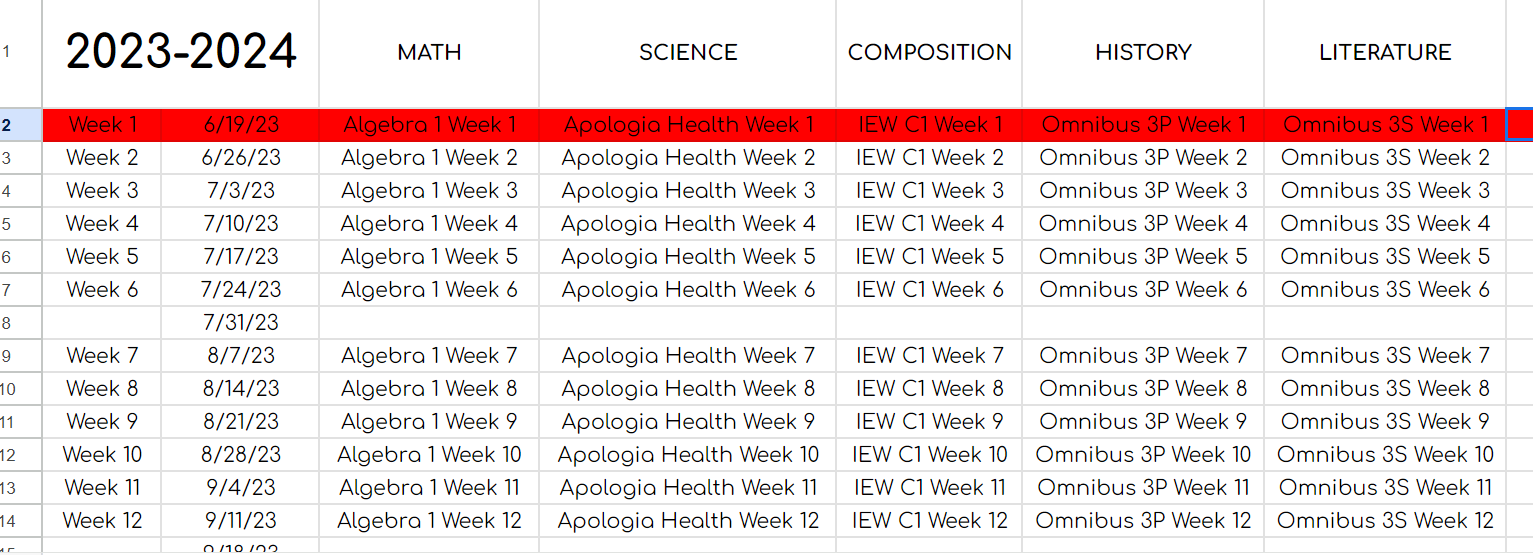
First, create a new spreadsheet in Google Sheets. Add a tab/sheet for each of your students at the bottom of the page and fill in your subject categories and school year across the top row.

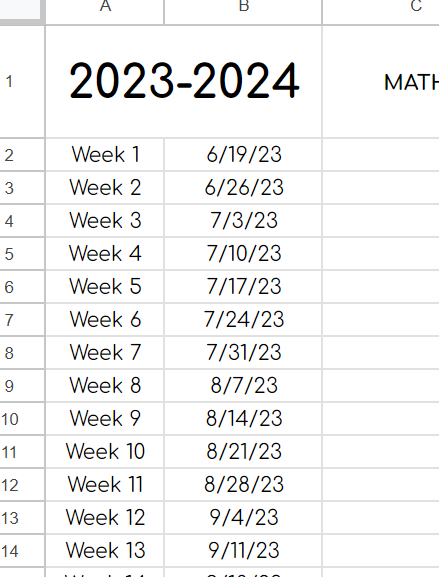
Now you’re going to create your calendar column, starting with the day of the week your school schedule starts and your first day of school for the year. That’s Monday, June 19th for us in this example. Fill in a few rows of consecutive Monday dates, select all, and drag your cursor down to fill in weekly dates starting with Mondays for your entire year (or the furthest date you want to schedule curriculum). Next to the dates column, I usually enter a column that says Week 1, Week 2, and so forth, as I need to keep track of attendance for my state homeschool records.
Next, you’re going to shift your Weeks according to when you would like to schedule time off. We have always generally done a Sabbath week schedule, which is six weeks of school followed by one week off, year-round. But this has changed a lot in recent years as I now have students taking college classes that follow a traditional school year schedule. However, we still try to stick to this style of schedule for our homeschool subjects. Leave the rows with time off blank. You’ll see in this example that we’re taking four weeks off for the fall festivals from mid-September to early October and a break for Thanksgiving on November 20th. Select the block of weeks and drag them down until you’ve gotten through your whole year (or Insert/Insert cells and shift down).

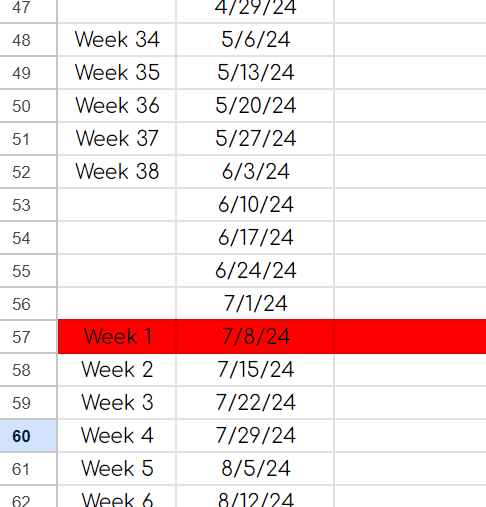
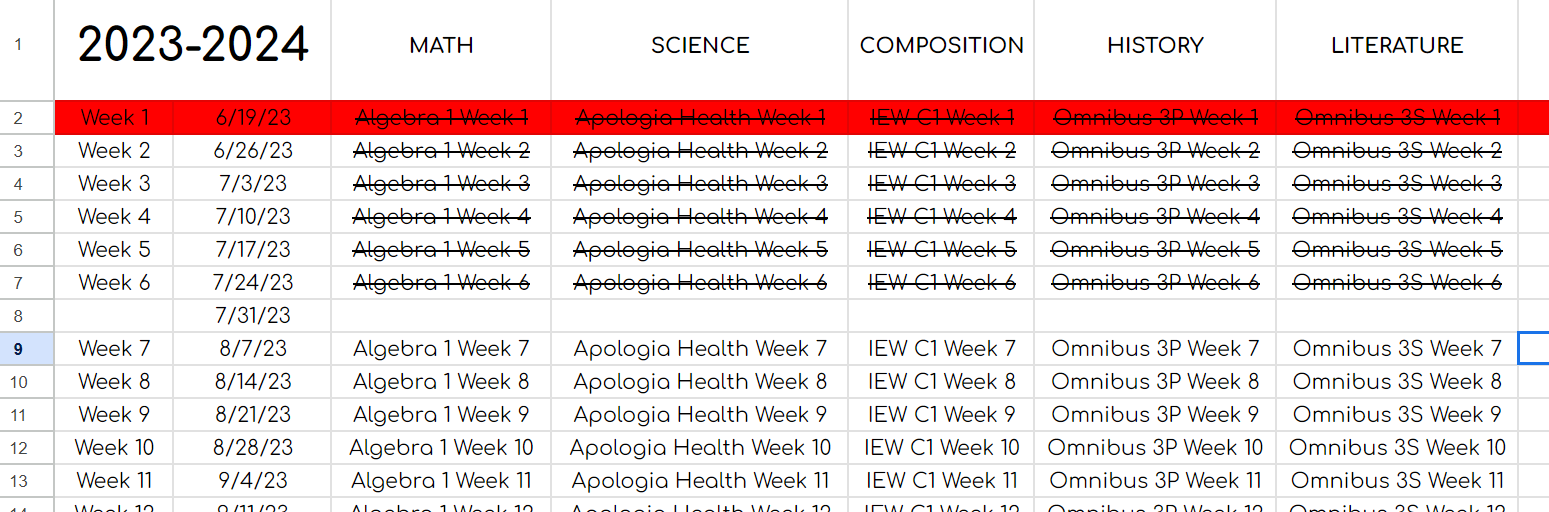
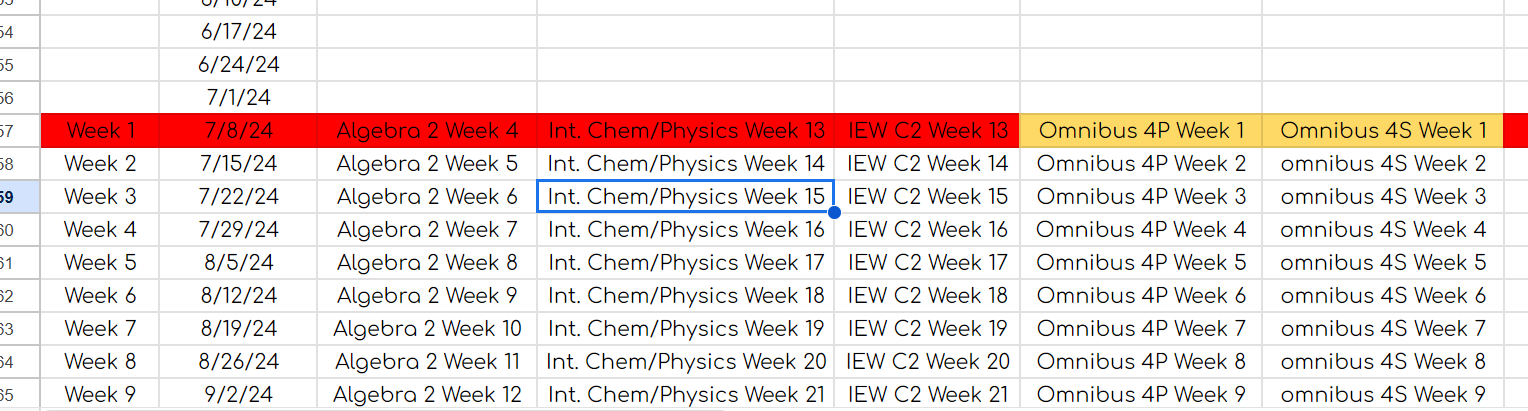
After you have blocked out your scheduled breaks for the year, you can leave space for the time between school years. We usually take a four week break between the end of one year and the start of the next one. I like to highlight in red the week that the next school year technically starts since our curriculum almost never ends exactly when our school year ends. It will make it easier to see as I’m scrolling around the spreadsheet later.
Now, it’s time to add in your subjects. I always start with the number of weeks my curriculum guides suggest, but I know that I will likely have to adjust throughout the year. I generally don’t schedule things like Bible and music because those things are always shifting with our family devotionals and developing musician skills. You could easily add them if that makes it easier to remember, though! You’ll keep a blank row of cells wherever you have scheduled breaks.
In this next example, you can see that I am giving myself a few extra weeks with my Algebra 1 student in case she does not finish on the suggested 32 week guide given to me by the curriculum publisher. I mark these extra weeks with dashes so I can see exactly when the material is supposed to end according to the publisher, as well as the wiggle room I’ve given us. I also know from experience that I will need an extra week or two for our composition class as we will be writing 12 paragraph essays those last two weeks and it often takes longer than I think it will. I like that I can move everything forward with a few swipes of the mouse whenever I need to for the inevitable things that come up throughout the year. I can always bump everything up if we’re moving through the material more quickly than expected as well.
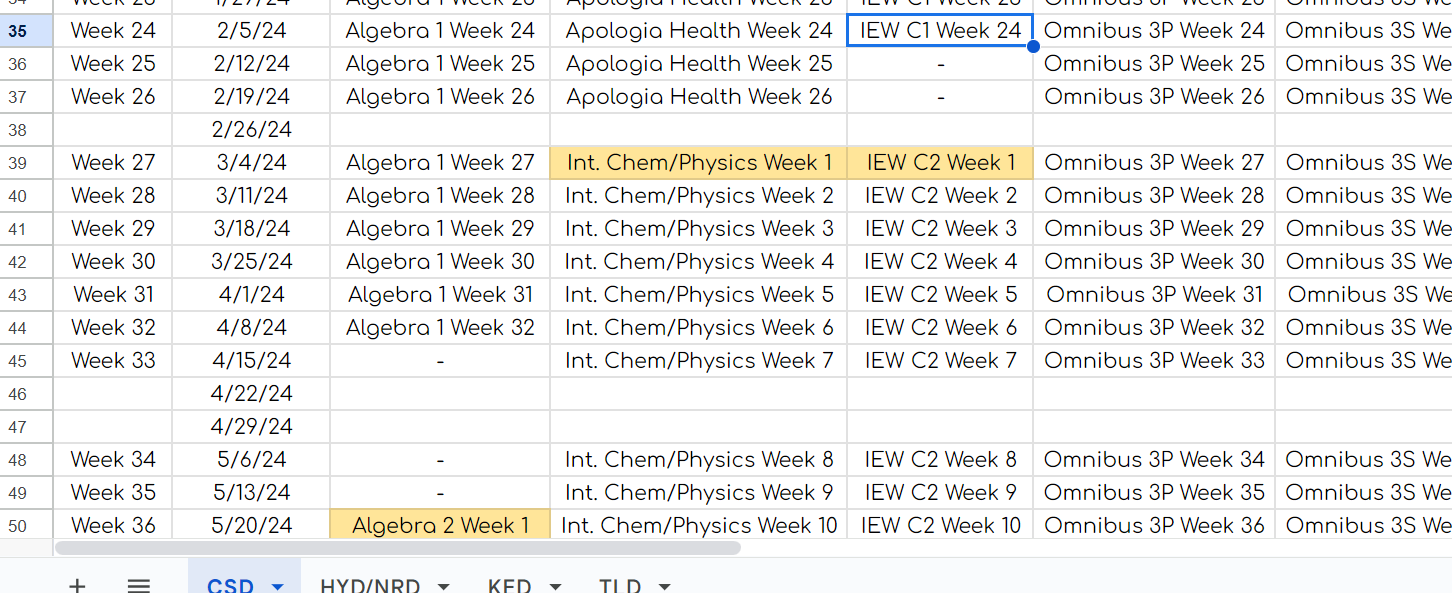
You can also see in the previous example that whenever I’m starting the next level of a particular subject, I highlight the new level’s Week 1 in yellow. I use this for budgeting purposes so I know when I can expect to have to purchase new materials. Again, we often purchase things throughout the year as our books do not often end exactly at the end of 36 weeks. This is a great help with so many students in our household. I also use highlights to mark off when I will need to be prepared for a more complex than normal school week, i.e. batch printing coloring pages for the next level of Story of the World or buying unusual products for a science experiment. This kind of pre-planning makes it more likely that we will actually DO the scheduled lessons and activities.
Now that you have created a basic overview schedule for the next few months or the whole school year, you can come back and adjust things when needed and to check that your daily/weekly planning is generally on track. If some event takes us completely off target or my students need significantly more time with material before moving on, I know that I need to come back to this master spreadsheet and shift everything forward or backward. I don’t generally record the small tweaks that can happen from day to day. Once I have scheduled the material from this master planning spreadsheet to my daily online Homeschool Tracker lesson planner (which is rarely more than about a six week block at a time), I come back and strikethrough everything that has been planned. You could also delete those rows and keep the current week’s schedule at the top of the spreadsheet, but I use the strikethrough method to keep track of records for the whole year.
If you end your school year with only a few subjects being totally completed, it is very easy to continue on from where you stopped without missing a beat. In this way, school for us is generally just ongoing. It’s pretty rare that we have all new curriculum at the start of a school year.
I encourage anyone planning ahead for high school to take a look at when subjects are scheduled to start and end to avoid an overly-challenging schedule or one that is not challenging enough. For example, I know that I will need to have my student finished with World Geography, Logic, and Advanced Spelling (three somewhat lighter classes) before we add in American Government or Economics because I know that those are quite challenging. Depending on my student, I will not schedule Algebra or Calculus at the same time I schedule AP Psychology, but Consumer Math might be a great fit here. Once we are in the high school years, I do plan out multiple years at a time (to be held on to loosely, of course). This way I can realistically see what things we have time to complete and which subjects we thought we might have wanted to do but really need to skip entirely (here’s looking at you, Greek). It easily enables me to schedule ample study sessions ahead of CLEP tests, as well as move around NHS commitments and college classes.
Hopefully, with this kind of spreadsheet planner, you will easily be able to see where things have to be adjusted to have a more successful homeschool year! Happy planning!
